If you’ve ever been lifting in a commercial gym, you’ve probably heard a trainer in there with a cutoff tee shouting “brace your core!”, with absolutely no context of how to do it.
Or maybe you’ve heard a trainer in an exercise video telling you to draw your bellybutton in to “engage your abs”, which just happens to be the exact opposite of bracing your core.
In this article I’m going to teach you exactly how to brace your core for lifting.
We are going to talk about why it’s important, and what it does to level up your lifts.
How To Brace Your Core For Lifting
Why Brace Your Core In The First Place?
Safety
How many times have you heard of someone hurting their back deadlifting or squatting?
A lot of times this is due to a lack of bracing, which causes spinal instability,
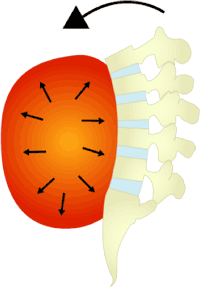
By properly bracing your core, your diaphragm contracts and presses down into the empty space of your abdominal cavity, and creates pressure to support and stabilize the spine.
This is called Intra-abdominal pressure (IAP), and is a vital piece of any heavy lift.

Think of your abdominal cavity like a water bottle.
If you have an empty water bottle, and you press down on the top of it, its going to instantly flatten.
If you take that same water bottle that is filled, and press down on it, it is supported and stable.
Now imagine that with a barbell on top of your back, crushing and compressing your spine, with an empty abdominal cavity. As you increase load, if you do not brace your core, it will flatten like an empty water bottle.
If you fill that abdominal cavity with pressure, it will stay strong under the heavy load.
This is why bracing your core is so important.
Strength
Safety should be the first and foremost concern of your lifting. But now that that’s out of the way, we can talk about the fun part. How this makes you stronger.
Creating intra-abdominal pressure creates a stable foundation for the body to perform heavy lifts. By creating this stable foundation, the body can produce more force and power, which will be directly translated into how much weight you can load on a barbell.
By creating strong IAP, force is transferred more efficiently throughout the body to your muscles and joints. The increased pressure in your abdominal cavity pushes against the walls of your abdominal cavity, which presses against the organs and muscles in the area. The pressure created here transfers to the spine, which is stabilized by the surrounding muscles.
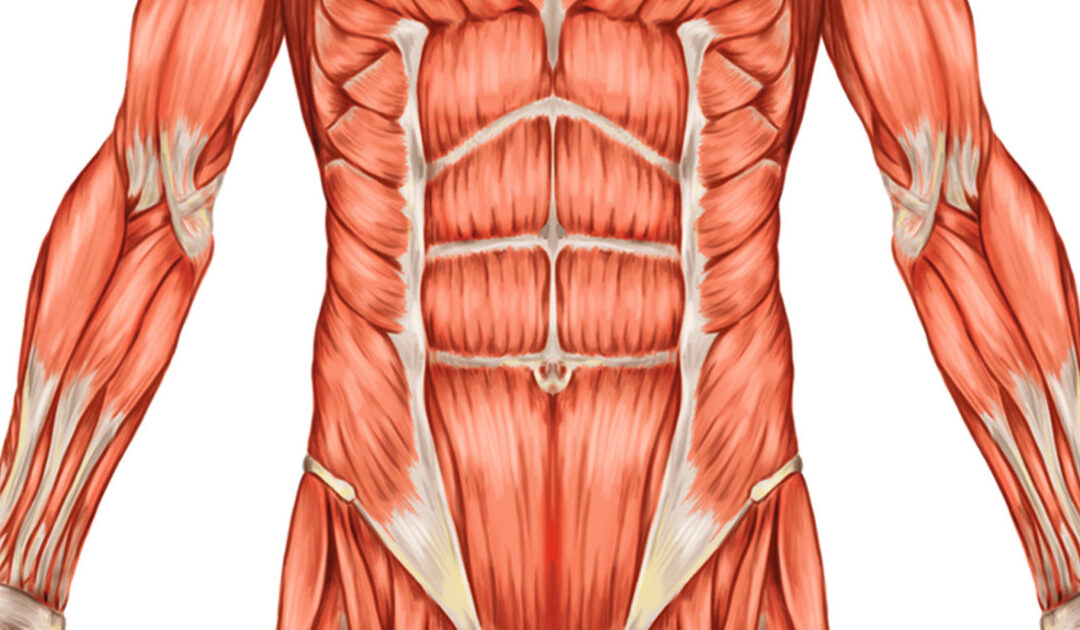
Creating more IAP helps you to recruit more muscle fibers and generate more force. More muscle fibers are recruited from the abdominal muscles, the pelvic floor, the and the back muscles. More muscle recruitment means more force exerted. Thus you generate more strength gains.
You can think of intra-abdominal pressure like putting on a superhero suit. Without it, you are weaker, more vulnerable.
With IAP, you’ve put on your supersuit, and it has made you stronger. The suit is made up of the muscles in your abdomen, back, and pelvis that work together to create superhuman pressure, to allow you to lift heavier things.

How To Brace Your Core For Lifting
Breathing
So now you know the basics of IAP, let’s discuss how to apply it.
Let’s walk through an exercise you can do right now to first get the breathing technique down.
- Lay down on your back with your knees bent and feet flat on the floor. Place one hand on your chest and the other hand on your belly.
- Take a few normal breaths and notice the movement of your hands. You should feel your chest and belly rise and fall with each breath.
- Now, take a deep breath in through your mouth and focus on expanding your belly with air, while keeping your chest relatively still. You should feel your belly rise and your hand on your belly move up.
- As you exhale, focus on contracting your abdominal muscles and pushing the air out, while keeping your chest still. You should feel your belly fall and your hand on your belly move down.
- While maintaining the bracing sensation in your core, take a few more breaths, feeling the difference between normal breathing and breathing with IAP.
By laying down and feeling the movement of your hands on your chest and belly, you can more easily differentiate between normal breathing and breathing with IAP. By focusing on expanding your belly with air and contracting your abdominal muscles, you can create the necessary intra-abdominal pressure for lifting. Practicing this technique will help you to improve your core stability and increase your strength and safety during lifting.
Pushing
Now that you’ve got the breathing portion, let’s focus on how to engage the adbominal muscles.
Remember that engaging your abdominal muscles is not pulling your bellybutton in. In fact it’s the opposite.
You want to push your abdomen out.
Let’s walk through another drill on how to do that.
- Stand tall and place your thumb on your lower back, and your fingers on your belly.
- Imagine that someone is about to punch you in the stomach, and engage your abdominal muscles by pressing your belly into your fingers.
- You should feel a tightening sensation in your core muscles, including your abs, obliques, and lower back.
- Try to maintain this tension while still being able to breathe normally.
- Hold this position for a few seconds and release, repeating the process until you feel comfortable with engaging your abdominal muscles.
Putting it All Together
Now that you have learned the proper breathing and pushing techniques, it’s time to combine them to brace your core for lifting.
Start by taking a deep breath in through your mouth, expanding your belly with air, and pushing your abdomen out. This should create the necessary intra-abdominal pressure for lifting.
As you lift the weight, continue to push your abdomen out and maintain the bracing sensation in your core. Exhale as you reach the top of the lift, and inhale before you the weight back down.
Remember to engage your core muscles throughout the entire lift, from the start to the finish. Practicing this technique will help you to improve your core stability, increase your strength, and prevent injury during lifting.
Reset that brace before the start of every single rep.
How To Brace Your Core For Lifting
When To Brace Your Core
Now that you’ve learned to brace properly, we need to discuss when to do it, and at what intensity.
One thing to learn is that bracing your core is more of a dial than an on/off switch. You can brace your core at an intensity of 10, or you can brace it a little at an intensity of 3.
If you’re doing a more accessory/isolation type exercise, you may want to dial the switch back to a 2. But if you’re doing a max effort deadlift, you’re going to want to turn that dial to 11.

Compound Exercises
Compound exercises are exercises that involve multiple joint movements, and more than one muscle group. They require a high degree of strength and stability in your core to perform the exercises safely and effectively. Some compound exercise examples are: squats, deadlifts, bench press, overhead press, rows.
When doing a compound exercise, you should brace your core throughout the entirety of the movement, from the moment you begin the lift, to the moment you end. This will stabilize the spine, engage the abdominal muscles, and help you exert maximal force.
When performing exceptionally heavy sets, you should turn the brace your core dial all the way up. When your dial is all the way up, we will be using the Valsalva maneuver.
Using The Valsalva Maneuver
The Valsalva maneuver is a breathing technique that involves taking a deep breath and holding it while bearing down against a closed airway by pressing the tongue against the roof of the mouth. This creates a significant amount of intra-abdominal pressure (IAP), which can help stabilize the spine and support heavy lifting. This creates a “locked-in” feeling, making your core muscles more rigid and stable. By doing so, it can increase the amount of weight you can lift and reduce the risk of injury.
When you perform the Valsalva maneuver, you essentially turn your core bracing dial up to 10, creating a maximum amount of intra-abdominal pressure. This can be useful during exercises that require maximal effort, such as a 1-rep max deadlift, where you need all the stability and support you can get to lift the weight.
To perform the Valsalva maneuver, take a deep breath in and hold it while you contract your abdominal and pelvic floor muscles. The sensation should be similar to when you are bearing down to take a poop. Extremely important… don’t actually poop. Continue to hold your breath and the bracing sensation throughout the lift, and exhale once the weight has been successfully lifted or moved.
It’s worth noting, however, that performing the Valsalva maneuver carries some risks, especially if you have a medical condition that affects your heart or blood pressure. Holding your breath can increase your blood pressure and heart rate, which can be dangerous if you’re not used to it or if you have an underlying condition.
Setting The “Core Brace Dial” Lower
Not every compound lift requires you to turn your brace all the way up to 10. If you are doing a max effort repetition of one, on a barbell deadlift or squat for example. Yes, turn it up to 10. Even on a heavy set of 3, yes turn it up to 10.
But let’s say you’re doing a set of 10 goblet squats. Your core brace dial should be turned up to a moderate level. This means you should engage your core muscles enough to maintain proper form and stability throughout the movement, but not to the point where you are holding your breath or straining excessively. You should still take a large breath in, and push your abdominal muscles. But you should be breathing relatively normal.
The size of the brace should match the size of the intensity of a single rep for each set. Your heavy set of 3 will require a big brace, your lighter set of 10 will require a moderate brace
Accessory/Isolation Exercises
When doing accessory/isolation exercises, you won’t need to brace as hard as you would for a max effort deadlift.
But a small degree of bracing is still going to help provide stability through the spine, and help you to exert more force.
If you’re doing a set of bicep curls for example, you may want to still push your abdominals out, like Mike Tyson were about to come punch you in the stomach, but you will want to breathe normally.
Pushing through your abdominals will help keep the spine neutral and stiff, and reduce any swaying through the spine that can stress the low back.
When doing a set of lunges, or Bulgarian split squats, you will need to brace your core through pushing your abdominals out, to help maintain single leg balance. But you don’t need to breathe in so deep that you turn blue in the face. Don’t be the person passing out from holding their breath doing a bicep curl or a lunge.

How To Brace Your Core For Lifting
Using A Lifting Belt
Should I Use A Lifting Belt?
Using a lifting belt is a personal choice, and it depends on various factors such as your fitness level, the type of exercise you’re doing, and your personal preference. A lifting belt can provide support and help maintain proper form while performing heavy lifts. It can also help to reduce the risk of injury to your lower back and spine by stabilizing the torso.
However, using a lifting belt doesn’t replace the need for proper form and technique. It’s crucial to learn proper form and technique for each lift before incorporating a lifting belt into your routine. The very first thing you need to do before even considering using a belt, is to learn the proper bracing technique. The belt provides you a firm object for your abdominal muscles to push against.
It only works if you are creating the necessary intra-abdominal pressure to push into it. It does not magically provide protection to your lower back just by strapping the belt on and hoping for the best. It is a tool to use to help get a stronger brace than one you already have without the belt.
If you have mastered the skill of bracing, then a belt can be a useful tool to provide additional support and stability during your heavy lifts. But it doesn’t need to be used all the time.
When To Use A Lifting Belt
A lifting belt should be used for exercises that place significant stress on the lower back and core muscles, such as squats and deadlifts. These lifts require the use of multiple muscle groups and can cause significant stress on the spine.
If you’re performing exercises with weights that are less than 80% of your 1-rep max, you may not need to use a lifting belt. However, if you’re lifting heavy weights that are above 80% of your 1-rep max, a lifting belt can help to provide additional support.
You should not rely solely on a lifting belt for support. You should still focus on developing proper form and technique and building core strength.
How To Use A Lifting Belt
When using a lifting belt, it’s important to position it correctly. The belt should be placed snugly around your waist, just above your hip bones. Make sure the belt is tight enough to provide support but not so tight that it restricts your breathing.
When lifting, take a deep breath and push your stomach out against the belt, you should feel the tightness of the belt as you push out into it. This will help to create intra-abdominal pressure, which will stabilize your spine and protect your lower back. Maintain this pressure throughout the lift, and exhale at the top of the lift.
Exercises To Strengthen Your Core
Compound Exercises
The absolute best way to strengthen your core bracing, is to practice it.
By doing compound lifts like squats/deadlifts and practicing proper bracing, you are building your core strength, and placing demand on the abdominal muscles.
These exercises require a strong core to maintain stability throughout the movement.
Isolation Ab Exercises
The abs shouldn’t be worked just from compound exercises alone, it’s important to include exercises that directly target your abs as well.
Squats and deadlifts are amazing exercises, that challenge your core strength and stability. They work your core isometrically. Meaning that your core does not move throughout the movement, and it’s job is to stay as stiff and stable as possible. But if you want a well rounded and strong core, you’re going to have to work your core through movement as well as isometric contractions.
That’s where more targeted abdominal work comes in.
Here’s some examples you can try for a well-developed and strong core.
Anti Extension
These exercises focus on preventing your lower back from arching excessively, which can cause strain or injury to the spine. Examples include:
- Plank
- Dead bug
Flexion
These exercises target the muscles on the front side of your body, which can help to improve your posture and overall core strength. These exercises work by moving the spine forwards. Examples include:
- Crunches
- Cable Crunches
- Reverse Crunches
Rotation
These exercises work to strengthen the muscles on the sides of your body, which can improve your stability and prevent injury. These work by resisting the movement of your spine bending sideways. Examples include:
- Bicycle crunches
- Russian twists
Anti Extension
These exercises focus on preventing your torso from rotating or twisting, which can help to improve your stability and prevent injury. Examples include:
- Pallof Press
- Cable rotations
Anti Lateral Flexion
These exercises target the muscles on one side of your body while preventing your torso from bending to the opposite side. Examples include:
- Side Plank
- Suitcase carry
How To Brace Your Core For Lifting: Final Thoughts
Now you’ve learned how to brace your core for heavy lifting by creating intra-abdominal pressure. Using the methods of breathing properly, and engaging your abdominal muscles, you’ve learned how to brace to exert as much force as possible, and keep yourself as safe as possible. A winning combo!
You’ve learned when and how much to brace your core for every applicable situation.
You’ve learned to push your abdomen out, and not draw your bellybutton in.
Now you’re ready to go slay your biggest of lifts! Let’s practice these techniques and be your strongest self yet.
Any questions, drop a comment below, or e-mail me at [email protected] and I’m happy to help.
Talk soon!
Nick

